
Sew up some Nesting Band Boxes in time for the holidays! Looking for a unique and sustainable way to package your gifts this holiday season? The Nesting Band Boxes are quick to make and come in 3 sizes. Best of all: it’s free!
Read on for a tutorial for quilting the fabric for your very own Nesting Band Boxes for the Holidays.

Michael Miller-Grandma’s Christmas Wish- Snow Play

Michael Miller- Home for the Holidays

Michael Miller-Snow Day Outing
I was honored to be asked to join in this year's Michael Miller Blog Hop. Today is my turn to share with you what I created using a variety of their Holiday Fabrics.
Michael Miller holiday themed fabrics are a perfect choice for creating the reusable nesting boxes. The variety of fabric choices ensure the boxes are just as pretty on the inside as they are on the outside. The best part of using these Nesting Band Boxes is that they won’t get tossed in the trash like traditional paper, gift bags, or boxes. Make hard to wrap shapes, clothing, toys, etc. easier to handle! Or create a beautiful gift box filled with your recipients’ favorite things


Neatly store the boxes away to be used again and again by simply stacking them inside of each other. Or give them to the gift recipient to reuse!


Interior Fabric: Michael Miller- Fairy Frost
They are a great way to safely store ornaments or other holiday items.


Interior Fabric: Michael Miller- Gingham Play
To say happy holidays to all of my wonderful customers and Michael Miller Fabrics, I have created a free pattern for everyone to download and enjoy. You can download your copy here: CLICK HERE

Interior Fabric: Michael Miller- Garden Pindot
Read on for instructions on how to quilt your fabrics to add a special touch to your Nesting Band Boxes.
Quilting the Exterior Pieces
For the Holiday Nesting Band Boxes

Cut out the Fabrics and Foam pieces:
You need to begin with pieces that are larger than the pattern pieces as when you do the quilting the pieces will shrink in size.
Here are the sizes you will want to cut for each Box Size-
SMALL: 1- 25” x 9” rectangle from both Main Fabric and Flex Foam
2- 9” x 9” squares from both Main Fabric and Flex Foam
MEDIUM: 1- 29” x 10” rectangle from both Main Fabric and Flex Foam
2- 10 ½” x 10 ½” squares from both Main Fabric and Flex Foam
LARGE: 1- 33” x 12” rectangle from both Main Fabric and Flex Foam
2- 11” x 11” squares from both Main Fabric and Flex Foam
Do not fuse the Flex Foam to the Main Fabric pieces just yet.
Prep the Pieces for Quilting:
1. Measure and draw on your lines onto the fabric where you will sew your quilt lines.

If you would like to do a diamond type pattern, I use the 30-degree mark on the ruler, aligning the angled line along a straight edge of the fabric
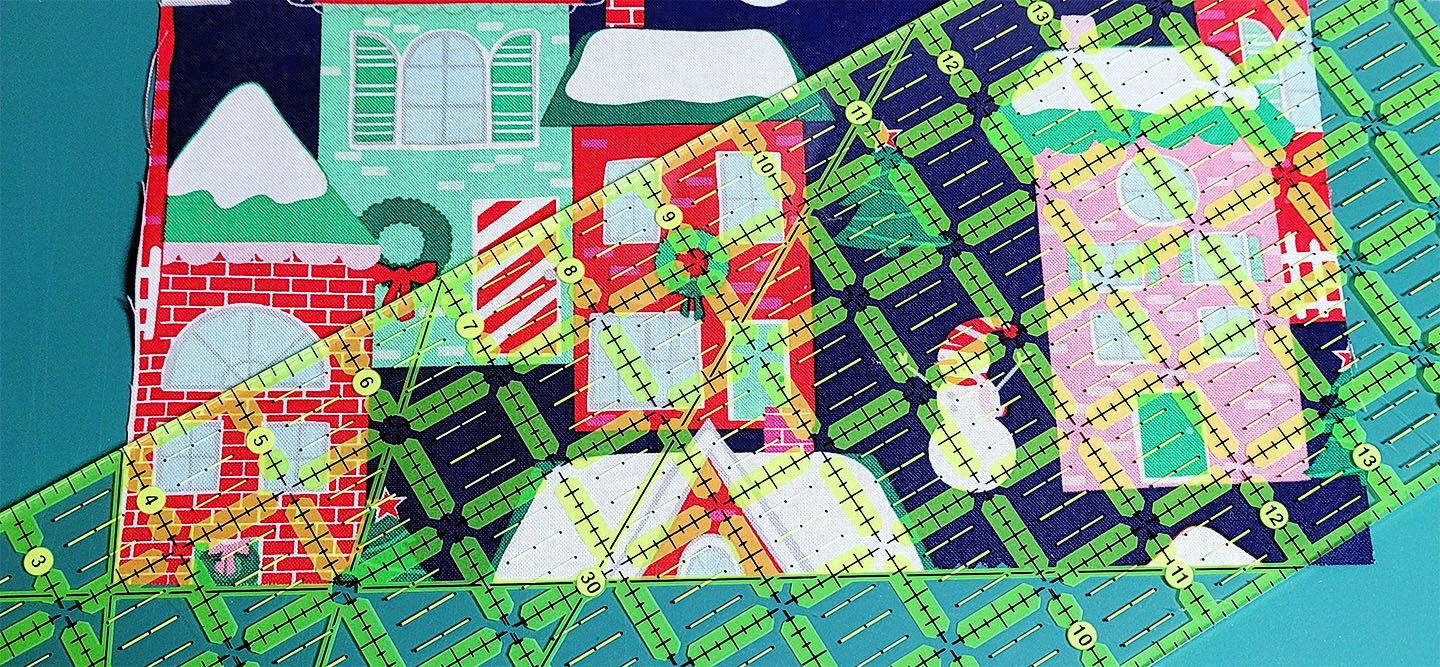
2. Using a Chalko or heat erasable pen draw your line the length of the fabric. You can continue to measure over 1” from the previous line and mark the next line. Continue until you have all of your quilt lines marked.

I have a gadget for my Janome that will measure the lines for me, which means I only need to mark the first line, set it how far apart I want the lines then, use the guide for the remaining lines. If you have one of these, it is a super time saver, so be sure to use it!
If you are drawing your lines onto the fabric, I recommend completing the drawing of the lines one way first then, once those are sewn, draw on your second set of lines and quilt those.
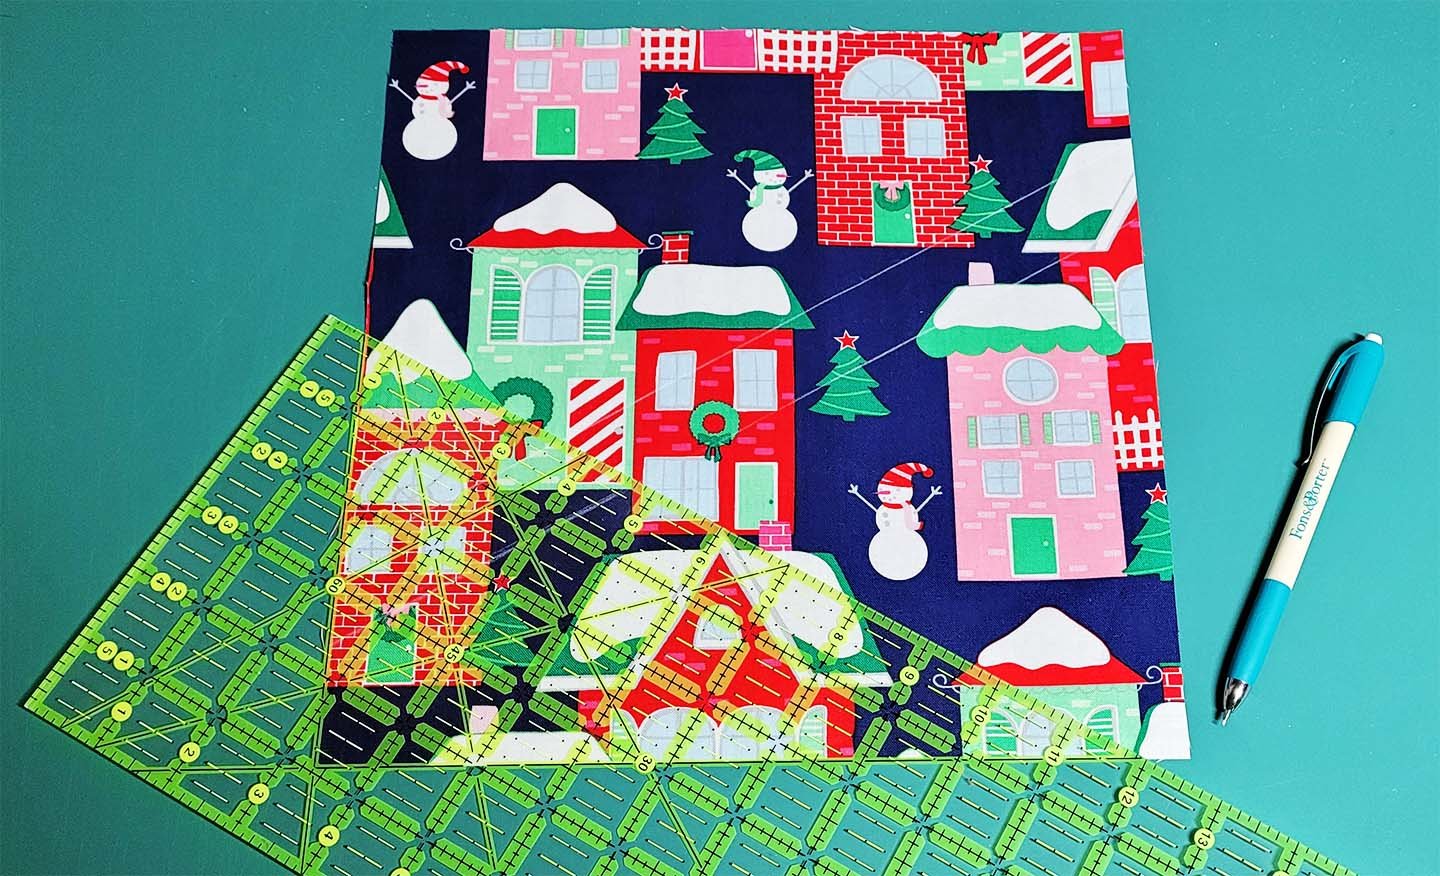
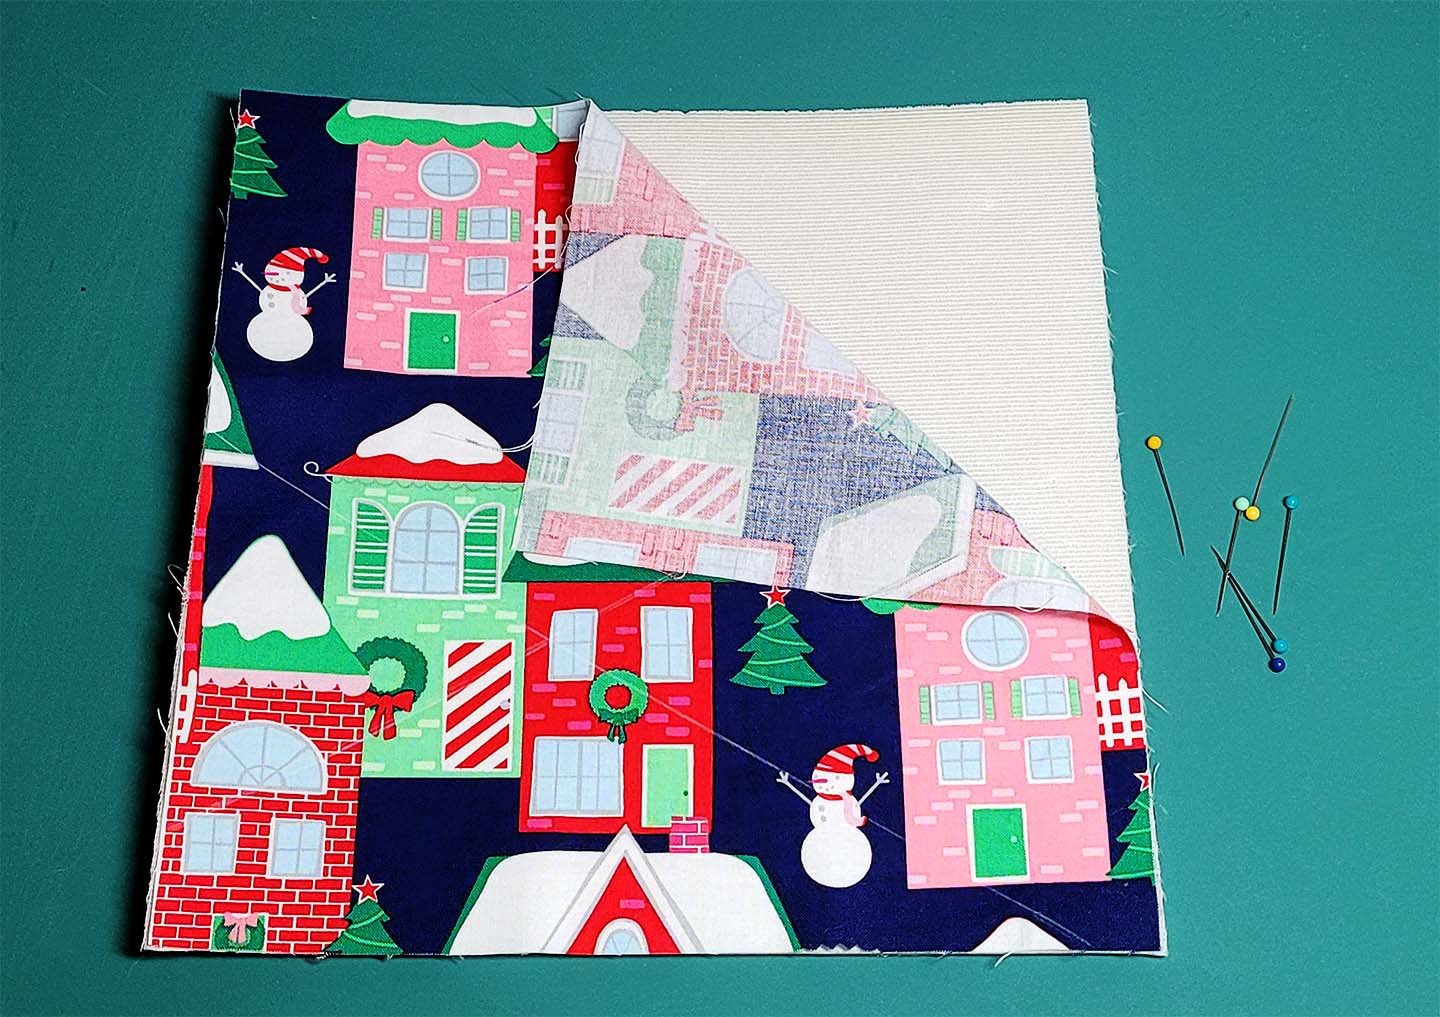
3. Place each Main Fabric piece onto the corresponding Flex Foam piece so the FUSIBLE SIDE of the flex foam is facing the WRONG SIDE of the Main fabric pieces. Pin in place. Do not fuse the flex foam as the pieces will shrink when you quilt them and could distort the pieces if the flex foam is adhered.
Smooth out the fabric so it lays nice and flat and pin it to the foam.
Quilt the pieces:
1. You will want to use a slightly larger stitch length to do the quilting I use a 3.0. You may also need to adjust the presser foot height and tension from the settings you normally use. I usually raise my foot from a 3 to a 2 to accommodate the thickness. I also use a walking foot as I find it easier to quilt the fabric on foam with it.

I recommend stitching a few lines on a scrap piece of fabric over a piece of flex foam to be sure you are happy with your settings. So much easier than ripping stitches out!
2. Begin in the center of your piece and work towards one side first.

3. Then, quilt the lines on the opposite side of the center. This will help keep your fabric laying nice and flat as you work towards the edges.

4. After you get all of the quilt lines stitched one way. Draw your second set of lines going in the opposite direction.

5. Starting in the center again, stitch all of the lines going in one direction, then finish quilting the lines on the opposite side of the center.

Finishing:
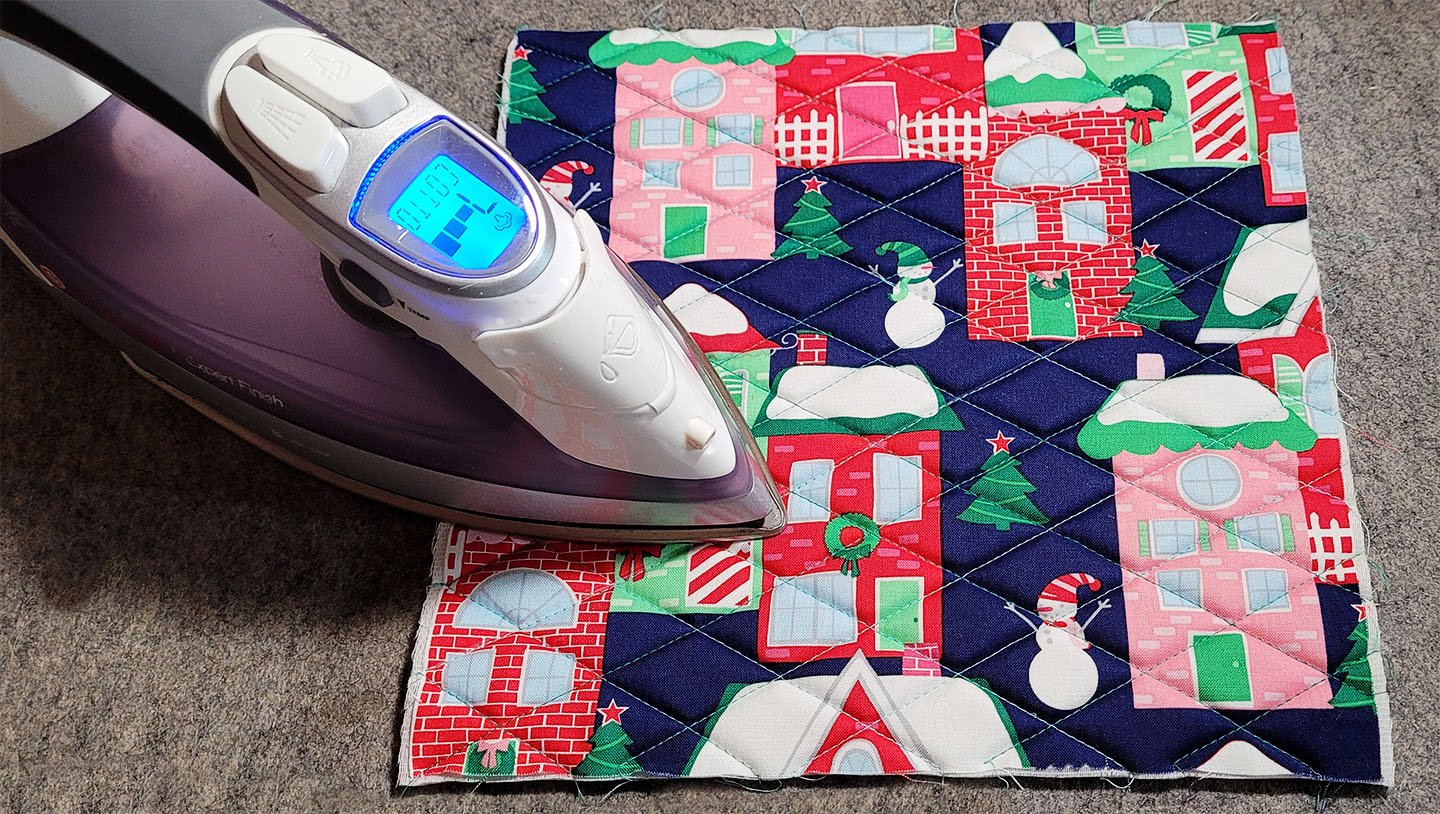
1. Once all your pieces are quilted fuse the Flex Foam to the fabric pieces. Press the pieces until they are nice and flat.
2. Cut your two Exterior Circle pieces (Piece A and B) from the quilted squares and your two Exterior Side pieces (Piece C and D) from the large quilted rectangle piece, for each of the sizes you have chosen to make.

Your Exterior Pieces are complete and ready to begin!

Cut the Lining Fabric and Interfacing pieces as directed in the pattern then, fuse the interfacing pieces to the wrong side of the Lining Fabrics. Your prep is all finished. Follow the instructions to complete your Nesting Box(es). starting on Page 4: Instructions to Complete the Nesting Band Boxes: